Trong kho game đổi thưởng tại QH88, nổ hũ Natra đang trở thành cái tên thu hút đông đảo người chơi nhờ sự kết hợp hoàn hảo giữa cốt truyện thần thoại, đồ họa mãn nhãn và giá trị thưởng vượt trội. Lấy cảm hứng từ Natra – vị chiến thần bất tử trong văn hóa Trung Hoa, trò chơi mang đến trải nghiệm quay hũ kịch tính, nơi mỗi vòng quay đều ẩn chứa cơ hội đổi đời.
Không đơn thuần là một tựa game quay thưởng, nổ hũ Natra tại QH88 được xây dựng như một cuộc chinh phục kho báu, nơi người chơi hóa thân thành chiến binh săn vàng giữa những trận chiến rực lửa.
Mục lục:
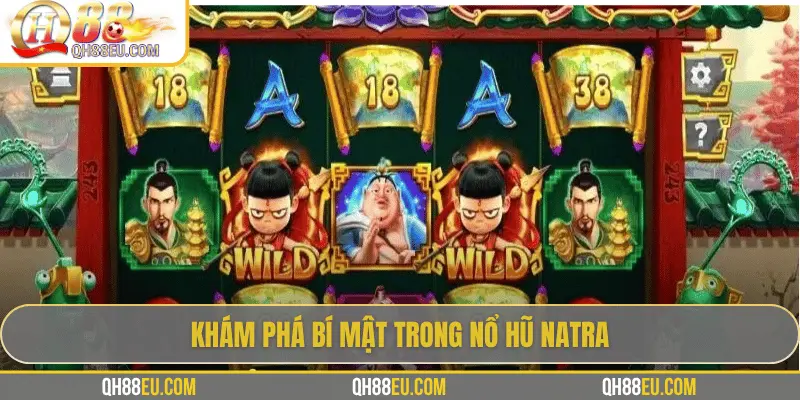
Khám phá bí mật trong nổ hũ Natra tại QH88
Để hiểu vì sao trò chơi này lại được yêu thích đến vậy, hãy cùng tìm hiểu chi tiết cách vận hành và các yếu tố cốt lõi tạo nên sức hút của Natra quay hũ QH88.
Cách vận hành vòng quay
Nổ hũ Natra tại QH88 sử dụng cơ chế quay hũ quen thuộc, phù hợp với cả người mới. Người chơi chỉ cần chọn mức cược, sau đó kích hoạt vòng quay để các biểu tượng thần thoại xuất hiện ngẫu nhiên trên màn hình.
Khi các biểu tượng xếp thành tổ hợp hợp lệ, hệ thống sẽ tự động trả thưởng. Đặc biệt, nếu kích hoạt đúng thời điểm, hũ thưởng tại QH88 sẽ phát nổ với giá trị cực lớn.
Các biểu tượng đặc biệt và ý nghĩa phần thưởng
Game nổ hũ Natra QH88 sở hữu bộ biểu tượng độc đáo, gắn liền với cốt truyện:
- Biểu tượng Natra (Wild): Có khả năng thay thế các biểu tượng khác, giúp hoàn thiện tổ hợp thắng.
- Hỏa Luân: Kích hoạt vòng quay miễn phí và mở ra chuỗi thưởng liên tiếp.
- Ngọc linh – binh khí – thần thú: Mang giá trị thưởng khác nhau, càng hiếm thì phần thưởng càng lớn.
Mỗi biểu tượng không chỉ mang ý nghĩa về mặt thưởng mà còn góp phần tái hiện trọn vẹn thế giới thần thoại trong game.
Tỷ lệ nổ hũ cao – cơ hội làm giàu thực sự
Một trong những lý do khiến nổ hũ Natra tại QH88 được đánh giá cao là tỷ lệ trả thưởng cân bằng. Hệ thống không thiên lệch, cho phép người chơi nổ hũ nhiều lần trong ngày nếu biết kiểm soát vốn và lựa chọn nhịp quay hợp lý.
Cả người chơi mới lẫn người có kinh nghiệm đều có cơ hội tiếp cận Jackpot, thay vì chỉ dành cho nhóm cược lớn như nhiều tựa game khác.
Điểm đặc sắc làm nên thương hiệu nổ hũ Natra tại QH88
Không chỉ sở hữu cốt truyện cuốn hút mà sảnh nổ hũ QH88 còn gây ấn tượng nhờ thiết kế đồ họa ấn tượng, âm thanh sống động và cơ chế thưởng độc đáo.
Hình ảnh và âm thanh sống động
Nổ hũ Natra tái hiện hoàn hảo hình ảnh vị thần trẻ tuổi cưỡi hỏa luân, tung chưởng giữa biển lửa rực cháy. Mỗi vòng quay là một khung cảnh mãn nhãn, với ánh sáng bùng nổ, bên cạnh đó, phần âm nhạc hùng tráng cùng tiếng rồng gầm, tiếng kim loại va chạm càng làm tăng độ kịch tính.
Cơ chế thưởng linh hoạt và siêu hấp dẫn
Điều khiến người chơi mê mẩn nổ hũ Natra tại QH88 là hệ thống thưởng phong phú. Ngoài Jackpot, còn có phần thưởng phụ như xu vàng, vòng quay miễn phí, thẻ nhân thưởng, hoặc phần quà hiện vật từ sự kiện đặc biệt.
Đặc biệt, khi kích hoạt “Chế độ thần chiến”, toàn bộ vòng quay sẽ chuyển sang giao diện đặc biệt, nơi mọi biểu tượng đều có thể mang lại phần thưởng gấp đôi.
Chương trình quà tặng và những sự kiện hấp dẫn
Để tăng thêm hứng thú, QH88 còn thường xuyên tung ra các chương trình hấp dẫn như “Tuần lễ Hỏa luân”, “Săn thưởng thần chiến”, hay “Lễ hội vàng rực lửa”. Trong thời gian này, người chơi có thể nhận thêm xu, vòng quay miễn phí hoặc quà tặng giới hạn như vật phẩm Natra phiên bản đặc biệt.

Bí quyết tăng tỷ lệ thắng
Đối với người chơi yêu thích thử thách, việc nắm được một vài mẹo nhỏ có thể giúp bạn tăng đáng kể cơ hội “phá hũ” và mang về phần thưởng lớn.
Chọn mức cược phù hợp
Theo kinh nghiệm từ nhiều cao thủ, săn thưởng Natra có xu hướng dễ nổ hơn khi người chơi duy trì mức cược trung bình và quay đều tay. Việc tăng giảm đột ngột hoặc quay quá nhanh có thể khiến hệ thống khó nhận diện chuỗi thắng.
Lựa chọn thời điểm phù hợp
Thời điểm “vàng” để quay hũ thường rơi vào buổi tối hoặc đầu tuần, khi lượng người chơi tăng cao. Lúc này, tỷ lệ cộng dồn phần thưởng lớn hơn, giúp bạn dễ dàng kích hoạt Jackpot.
Tận dụng lượt miễn phí và nhân thưởng
Mỗi khi mở khóa được tính năng “Hỏa luân may mắn”, hãy tận dụng triệt để. Các vòng quay miễn phí này không chỉ giúp tiết kiệm vốn mà còn tăng gấp đôi cơ hội trúng thưởng, đặc biệt là khi có biểu tượng Natra xuất hiện liên tiếp.
Tham khảo thêm: Nổ Hũ Rồng – Hành Trình Săn Jackpot Kho Báu Long Thần Tại QH88
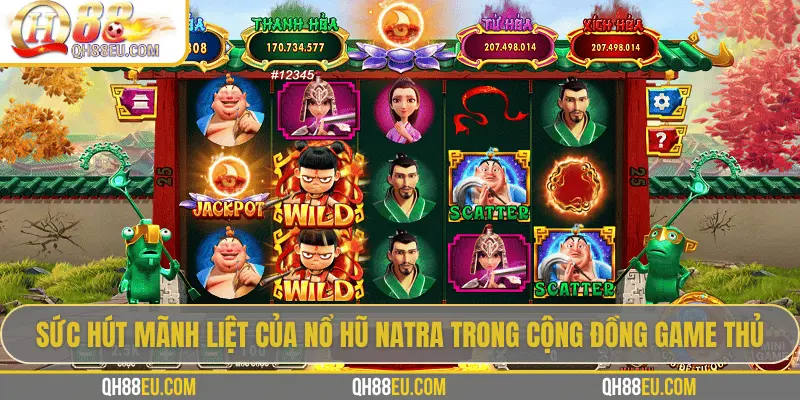
Sức hút mãnh liệt của nổ hũ Natra trong cộng đồng game thủ QH88
Sự kết hợp giữa đồ họa đỉnh cao, âm thanh hoành tráng và phần thưởng giá trị đã giúp nổ hũ Natra trở thành tâm điểm của cộng đồng yêu thích game quay hũ.
Cộng đồng người chơi đông đảo
Rất nhiều nhóm chơi nổ hũ Natra được thành lập trên mạng xã hội, nơi người chơi chia sẻ chiến thuật, kinh nghiệm và cập nhật sự kiện mới nhất. Đây cũng là nơi nhiều người “khoe” chiến tích trúng hũ khủng – tạo động lực và cảm hứng cho những ai muốn thử vận may.
Tính giải trí và đem lại lợi nhuận lớn
Nổ hũ Natra không chỉ mang tính giải trí mà còn giúp người chơi tận hưởng cảm giác thắng lớn. Mỗi lần hũ nổ là một lần trái tim “rực cháy”, mang đến cảm giác phấn khích khó tả. Không ít người đã “đổi đời” chỉ sau vài lượt quay nhờ vận may thần thánh.
Tương lai bùng nổ mạnh mẽ trong năm 2025
Với tốc độ lan tỏa nhanh chóng, tựa game Natra quay hũ được dự đoán sẽ tiếp tục giữ vị trí hàng đầu trong thị trường game đổi thưởng. Các bản cập nhật mới dự kiến sẽ bổ sung thêm nhiều tính năng, nhân vật và phần thưởng giá trị hơn, hứa hẹn mang đến trải nghiệm ngày càng cuốn hút.
Kết luận
Nổ hũ Natra không chỉ là trò chơi quay thưởng thông thường, mà là hành trình khám phá sức mạnh và vận may của chính bạn. Với hình ảnh đẹp mắt, cốt truyện hấp dẫn và phần thưởng cực khủng, trò chơi này xứng đáng là lựa chọn số một cho những ai yêu thích cảm giác “nổ hũ đổi đời” tại Qh88.
Mọi thông tin chi tiết vui lòng liên hệ với chúng tôi theo:
- Địa chỉ: 456 Đường Phan Đăng Lưu, Phường 2, Quận Phú Nhuận, TP. Hồ Chí Minh, Việt Nam
- Hotline: 0911.123.456
- Website: https://qh88eu.com/
- Email: qh88eu@gmail.com

Tôi là Doris Phương, tác giả của QH88EU.com. Với niềm đam mê trong lĩnh vực giải trí trực tuyến, tôi luôn mong muốn mang đến những thông tin giá trị cùng trải nghiệm tốt nhất cho người chơi. Cùng QH88, khám phá cơ hội giải trí đỉnh cao và giành chiến thắng mỗi ngày!